AlmaLinux 9.1で自分用のストレージサーバを構築する(Nextcloud編)
旧ブログ記事のアーカイブです
- 自宅鯖 構成メモ 2023
- AlmaLinux 9.1 で自分用のストレージサーバを構築する(KVM ホスト編)
- AlmaLinux 9.1 で自分用のストレージサーバを構築する(VM ゲスト編)
- AlmaLinux 9.1 で自分用のストレージサーバを構築する(Nextcloud 編) ← イマココ
Nextcloudとは OSS なオンラインストレージサービス。
Dropbox や OneDrive のようなサービスを、おうちに構築できる。
参考。
必要なものをインストールしていく。
具体的には
- nginx
- PHP 8.1 とモジュール群
- MySQL 8.0+
- FFmpeg
※ 後述する問題が発生する可能性があるのでおとなしく Apache HTTP Server で構築するのが無難。
インストール。
dnf install nginxnginx -vでバージョン確認。問題なし。
nginx version: nginx/1.20.1なにもしないと参照しているリポジトリの都合上 PHP8.0 しかインストールできない。
今回は PHP8.1 をインストールしたいので、PHP8.1 の remi リポジトリを参照できるように設定する。
dnf install https://rpms.remirepo.net/enterprise/remi-release-$(rpm -E %rhel).rpmdnf config-manager --set-enabled remiPHP をインストール。
dnf module reset phpdnf module install php:remi-8.1remi リポジトリから PHP8.1 をインストールすることができる。
======================================================================================================================================================= Package                               Architecture                Version                                     Repository                         Size=======================================================================================================================================================Installing group/module packages: php-cli                               x86_64                      8.1.20-1.el9.remi                           remi-modular                      5.2 M php-common                            x86_64                      8.1.20-1.el9.remi                           remi-modular                      832 k php-fpm                               x86_64                      8.1.20-1.el9.remi                           remi-modular                      1.8 M php-mbstring                          x86_64                      8.1.20-1.el9.remi                           remi-modular                      521 k php-xml                               x86_64                      8.1.20-1.el9.remi                           remi-modular                      203 kInstalling dependencies: httpd-filesystem                      noarch                      2.4.53-11.el9_2.5                           appstream                          14 k libxslt                               x86_64                      1.1.34-9.el9                                appstream                         240 k oniguruma5php                         x86_64                      6.9.8-1.el9.remi                            remi                              219 kInstalling weak dependencies: nginx-filesystem                      noarch                      1:1.20.1-14.el9.alma                        appstream                          11 kInstalling module profiles: php/commonEnabling module streams: php                                                               remi-8.1
Transaction Summary=======================================================================================================================================================Install  9 Packages
Total download size: 9.0 MInstalled size: 53 MIs this ok [y/N]:
php -vでバージョン確認。問題なし。
PHP 8.1.20 (cli) (built: Jun 6 2023 23:02:31) (NTS gcc x86_64)Copyright (c) The PHP GroupZend Engine v4.1.20, Copyright (c) Zend Technologies現在インストールされている PHP のモジュールはphp -mで確認できる。
[PHP Modules]bz2calendarCorectypecurldatedomexiffileinfofilterftpgettexthashiconvjsonlibxmlmbstringopensslpcntlpcrePharreadlineReflectionsessionSimpleXMLsocketsSPLstandardtokenizerxmlxmlreaderxmlwriterxslzlib
[Zend Modules]
現在インストールされているモジュールの情報を参考に、足りないモジュールをインストールしていく。
個人的には、外部認証の予定がないことと、個人利用なのでサーバーのパフォーマンス強化も不要かなということで、システム要件の
Required for specific appsFor enhanced server performance (optional) select one of the following memcaches
に書いてあるモジュールはインストールしなかった。
それ以外のモジュールをインストールする。
dnf install php-gd php-posix php-zip php-mysqlnd php-intl php-imagick======================================================================================================================================================= Package Architecture Version Repository Size=======================================================================================================================================================Installing: php-gd x86_64 8.1.20-1.el9.remi remi-modular 62 k php-intl x86_64 8.1.20-1.el9.remi remi-modular 209 k php-mysqlnd x86_64 8.1.20-1.el9.remi remi-modular 214 k php-pecl-imagick-im7 x86_64 3.7.0-7.el9.remi.8.1 remi-modular 187 k php-pecl-zip x86_64 1.22.1-1.el9.remi.8.1 remi-modular 74 k php-process x86_64 8.1.20-1.el9.remi remi-modular 64 k ...php -mで再確認。問題なし。
[PHP Modules]bz2calendarCorectypecurldatedomexiffileinfofilterftpgdgettexthashiconvimagickintljsonlibxmlmbstringmysqlimysqlndopensslpcntlpcrePDOpdo_mysqlpdo_sqlitePharposixreadlineReflectionsessionshmopSimpleXMLsocketsSPLsqlite3standardsysvmsgsysvsemsysvshmtokenizerxmlxmlreaderxmlwriterxslzipzlib
[Zend Modules]
※ 補足
php-posixはphp-processに含まれるようになった。
※ 余談
ちなみに Almalinux 9.1 でrpm -E %rhelを実行すると9と表示されるよ。
OS のメジャーバージョンが変わってもコピペで対応できるね。
検索キーワード: RPM マクロ
MySQL の 8.0 より高いバージョンをインストールする。
普通にインストールすれば OK。
dnf install mysql mysql-servermysql --versionでバージョン確認。問題なし。
mysql Ver 8.0.32 for Linux on x86_64 (Source distribution)おそらく Nextcloud (Web)上で音声や動画を表示する際に使うはず。
まず EPEL リポジトリと PowerTools(CRB) を有効にする。
dnf install epel-releasednf config-manager --set-enabled crb次に RPM Fusion リポジトリを追加する。
dnf install --nogpgcheck https://mirrors.rpmfusion.org/free/el/rpmfusion-free-release-$(rpm -E %rhel).noarch.rpmFFmpeg インストール。
dnf install ffmpegffmpeg -versionでバージョン確認。問題なし。
ffmpeg version 5.1.3 Copyright (c) 2000-2022 the FFmpeg developers...systemctl start nginx.servicesystemctl enable nginx.servicesystemctl start php-fpm.servicesystemctl enable php-fpm.servicesystemctl start mysqld.servicesystemctl enable mysqld.service/var/www/下に配置する。
wget https://download.nextcloud.com/server/releases/latest.tar.bz2dnf install bzip2tar jxvf latest.tar.bz2mv nextcloud /var/www/.とりあえずローカルネットワーク内で使用できれば OK なのでオレオレ証明書で凌ぐ。
openssl をインストールする。
dnf install opensslオレオレ証明書を作成。参考。
mkdir /etc/ssl/nginxopenssl genrsa -out /etc/ssl/nginx/server.key 2048openssl req -new -key /etc/ssl/nginx/server.key -out /etc/ssl/nginx/server.csropenssl x509 -days 3650 -req -signkey /etc/ssl/nginx/server.key -in /etc/ssl/nginx/server.csr -out /etc/ssl/nginx/server.crtvim /etc/nginx/conf.d/nextcloud.confで、Nextcloud 用の nginx の conf ファイルを作成&追記する。
公式 Docを参考に、基本的にはコピペで OK。
変更点として、
- php-handler は
/etc/nginx/conf.d/php-fpm.confに書いてある内容に合わせる - HTTPS 通信のための証明書は手順 5で作成したオレオレ証明書を参照するように設定する
nginx の conf ファイルの構文に問題がないかどうかはnginx -tで確認できる。
upstream php-handler {    # server 127.0.0.1:9000;    server unix:/run/php-fpm/www.sock;}
# Set the `immutable` cache control options only for assets with a cache busting `v` argumentmap $arg_v $asset_immutable {    "" "";    default "immutable";}

server {    listen 80;    listen [::]:80;    server_name 192.168.10.xxx;
    # Prevent nginx HTTP Server Detection    server_tokens off;
    # Enforce HTTPS    return 301 https://$server_name$request_uri;}
server {    listen 443      ssl http2;    listen [::]:443 ssl http2;    server_name 192.168.10.xxx;
    # Path to the root of your installation    root /var/www/nextcloud;
    # Use Mozilla's guidelines for SSL/TLS settings    # https://mozilla.github.io/server-side-tls/ssl-config-generator/    ssl_certificate     /etc/ssl/nginx/server.crt;    ssl_certificate_key /etc/ssl/nginx/server.key;    # ssl_certificate     /etc/ssl/nginx/cloud.example.com.crt;    # ssl_certificate_key /etc/ssl/nginx/cloud.example.com.key;
    # Prevent nginx HTTP Server Detection    server_tokens off;
    # HSTS settings    # WARNING: Only add the preload option once you read about    # the consequences in https://hstspreload.org/. This option    # will add the domain to a hardcoded list that is shipped    # in all major browsers and getting removed from this list    # could take several months.    #add_header Strict-Transport-Security "max-age=15768000; includeSubDomains; preload" always;
    # set max upload size and increase upload timeout:    client_max_body_size 512M;    client_body_timeout 300s;    fastcgi_buffers 64 4K;
    # Enable gzip but do not remove ETag headers    gzip on;    gzip_vary on;    gzip_comp_level 4;    gzip_min_length 256;    gzip_proxied expired no-cache no-store private no_last_modified no_etag auth;    gzip_types application/atom+xml text/javascript application/javascript application/json application/ld+json application/manifest+json application/rss+xml application/vnd.geo+json application/vnd.ms-fontobject application/wasm application/x-font-ttf application/x-web-app-manifest+json application/xhtml+xml application/xml font/opentype image/bmp image/svg+xml image/x-icon text/cache-manifest text/css text/plain text/vcard text/vnd.rim.location.xloc text/vtt text/x-component text/x-cross-domain-policy;
    # Pagespeed is not supported by Nextcloud, so if your server is built    # with the `ngx_pagespeed` module, uncomment this line to disable it.    #pagespeed off;
    # The settings allows you to optimize the HTTP2 bandwitdth.    # See https://blog.cloudflare.com/delivering-http-2-upload-speed-improvements/    # for tunning hints    client_body_buffer_size 512k;
    # HTTP response headers borrowed from Nextcloud `.htaccess`    add_header Referrer-Policy                   "no-referrer"       always;    add_header X-Content-Type-Options            "nosniff"           always;    add_header X-Download-Options                "noopen"            always;    add_header X-Frame-Options                   "SAMEORIGIN"        always;    add_header X-Permitted-Cross-Domain-Policies "none"              always;    add_header X-Robots-Tag                      "noindex, nofollow" always;    add_header X-XSS-Protection                  "1; mode=block"     always;
    # Remove X-Powered-By, which is an information leak    fastcgi_hide_header X-Powered-By;
    # Add .mjs as a file extension for javascript    # Either include it in the default mime.types list    # or include you can include that list explicitly and add the file extension    # only for Nextcloud like below:    include mime.types;    types {        js mjs;    }
    # Specify how to handle directories -- specifying `/index.php$request_uri`    # here as the fallback means that Nginx always exhibits the desired behaviour    # when a client requests a path that corresponds to a directory that exists    # on the server. In particular, if that directory contains an index.php file,    # that file is correctly served; if it doesn't, then the request is passed to    # the front-end controller. This consistent behaviour means that we don't need    # to specify custom rules for certain paths (e.g. images and other assets,    # `/updater`, `/ocm-provider`, `/ocs-provider`), and thus    # `try_files $uri $uri/ /index.php$request_uri`    # always provides the desired behaviour.    index index.php index.html /index.php$request_uri;
    # Rule borrowed from `.htaccess` to handle Microsoft DAV clients    location = / {        if ( $http_user_agent ~ ^DavClnt ) {            return 302 /remote.php/webdav/$is_args$args;        }    }
    location = /robots.txt {        allow all;        log_not_found off;        access_log off;    }
    # Make a regex exception for `/.well-known` so that clients can still    # access it despite the existence of the regex rule    # `location ~ /(\.|autotest|...)` which would otherwise handle requests    # for `/.well-known`.    location ^~ /.well-known {        # The rules in this block are an adaptation of the rules        # in `.htaccess` that concern `/.well-known`.
        location = /.well-known/carddav { return 301 /remote.php/dav/; }        location = /.well-known/caldav  { return 301 /remote.php/dav/; }
        location /.well-known/acme-challenge    { try_files $uri $uri/ =404; }        location /.well-known/pki-validation    { try_files $uri $uri/ =404; }
        # Let Nextcloud's API for `/.well-known` URIs handle all other        # requests by passing them to the front-end controller.        return 301 /index.php$request_uri;    }
    # Rules borrowed from `.htaccess` to hide certain paths from clients    location ~ ^/(?:build|tests|config|lib|3rdparty|templates|data)(?:$|/)  { return 404; }    location ~ ^/(?:\.|autotest|occ|issue|indie|db_|console)                { return 404; }
    # Ensure this block, which passes PHP files to the PHP process, is above the blocks    # which handle static assets (as seen below). If this block is not declared first,    # then Nginx will encounter an infinite rewriting loop when it prepends `/index.php`    # to the URI, resulting in a HTTP 500 error response.    location ~ \.php(?:$|/) {        # Required for legacy support        rewrite ^/(?!index|remote|public|cron|core\/ajax\/update|status|ocs\/v[12]|updater\/.+|oc[ms]-provider\/.+|.+\/richdocumentscode\/proxy) /index.php$request_uri;
        fastcgi_split_path_info ^(.+?\.php)(/.*)$;        set $path_info $fastcgi_path_info;
        try_files $fastcgi_script_name =404;
        include fastcgi_params;        fastcgi_param SCRIPT_FILENAME $document_root$fastcgi_script_name;        fastcgi_param PATH_INFO $path_info;        fastcgi_param HTTPS on;
        fastcgi_param modHeadersAvailable true;         # Avoid sending the security headers twice        fastcgi_param front_controller_active true;     # Enable pretty urls        fastcgi_pass php-handler;
        fastcgi_intercept_errors on;        fastcgi_request_buffering off;
        fastcgi_max_temp_file_size 0;    }
    # Serve static files    location ~ \.(?:css|js|mjs|svg|gif|png|jpg|ico|wasm|tflite|map)$ {        try_files $uri /index.php$request_uri;        add_header Cache-Control "public, max-age=15778463, $asset_immutable";        access_log off;     # Optional: Don't log access to assets
        location ~ \.wasm$ {            default_type application/wasm;        }    }
    location ~ \.woff2?$ {        try_files $uri /index.php$request_uri;        expires 7d;         # Cache-Control policy borrowed from `.htaccess`        access_log off;     # Optional: Don't log access to assets    }
    # Rule borrowed from `.htaccess`    location /remote {        return 301 /remote.php$request_uri;    }
location / { try_files $uri $uri/ /index.php$request_uri; }}/etc/php-fpm.d/www.confを編集する。
env[PATH]はecho $PATHの実行結果にする。
[root@ap-al91 ~]# echo $PATH/root/.local/bin:/root/bin:/usr/local/sbin:/usr/local/bin:/usr/sbin:/usr/bin; Pass environment variables like LD_LIBRARY_PATH. All $VARIABLEs are taken from; the current environment.; Default Value: clean envenv[HOSTNAME] = $HOSTNAMEenv[PATH] = /root/.local/bin:/root/bin:/usr/local/sbin:/usr/local/bin:/usr/sbin:/usr/binenv[TMP] = /tmpenv[TMPDIR] = /tmpenv[TEMP] = /tmp※ 上記項目はデフォルトでは「;」でコメントアウトされているため、忘れずに先頭の「;」を削除する。
/etc/php.iniを編集する。
この VM に対して 8GB のメモリを割り当ててあるので、その範囲内で適当に割り当てる。
memory_limit = 4Gpost_max_size = 2Gupload_max_filesize = 2Groot でログイン。パスワードは何も入力しない。
mysql -p -u rootNextcloud 用のデータベースとデータベースを操作するユーザを作成する。
CREATE DATABASE nextcloud DEFAULT CHARACTER SET utf8mb4;SHOW DATABASES;CREATE USER 'nextcloud_admin'@'localhost' IDENTIFIED BY 'hogehoge';GRANT ALL ON nextcloud.* TO 'nextcloud_admin'@'localhost';SHOW GRANTS FOR 'nextcloud_admin'@'localhost';exit;firewall-cmd --list-allfirewall-cmd --zone=public --add-service=http --permanentfirewall-cmd --zone=public --add-service=https --permanentfirewall-cmd --reloadfirewall-cmd --list-allいろいろやったので reboot。
Nextcloud をセットアップする。
まずは/var/www/nextcloudディレクトリの所有者をapacheにする。
chown -R apache:apache /var/www/nextcloud次に/var/www/nextcloud下のconfigとappsディレクトリに書き込み権限を追加する。
chmod g+w /var/www/nextcloud/configchmod g+w /var/www/nextcloud/appschmod o+w /var/www/nextcloud/configchmod o+w /var/www/nextcloud/appsSELinux を一時的に無効にする。
setenforce 0ここまで完了したら、http://サーバのIPアドレスでアクセスする。
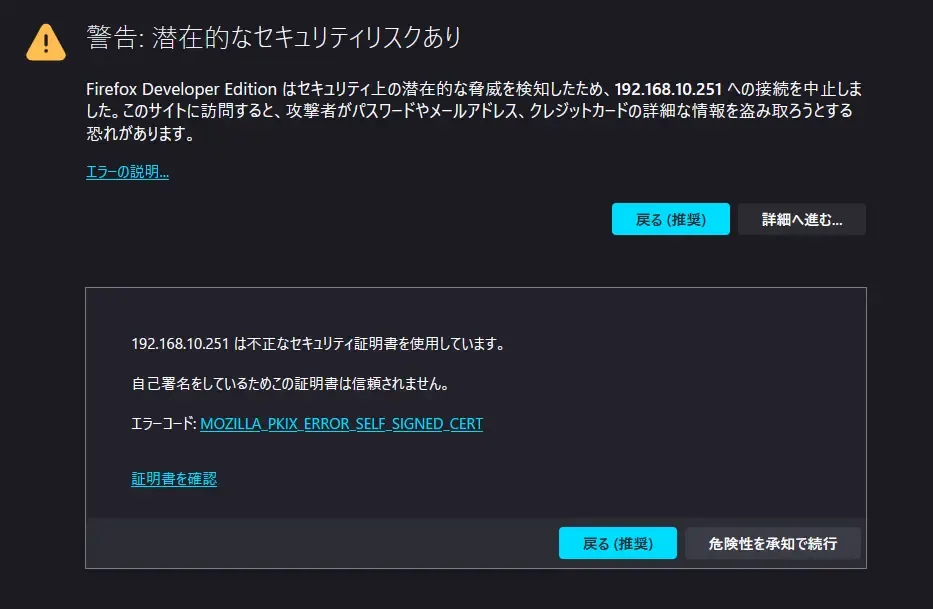
オレオレ証明書を使っているため、FireFox では下の画像のような警告が出るが無視して進む。
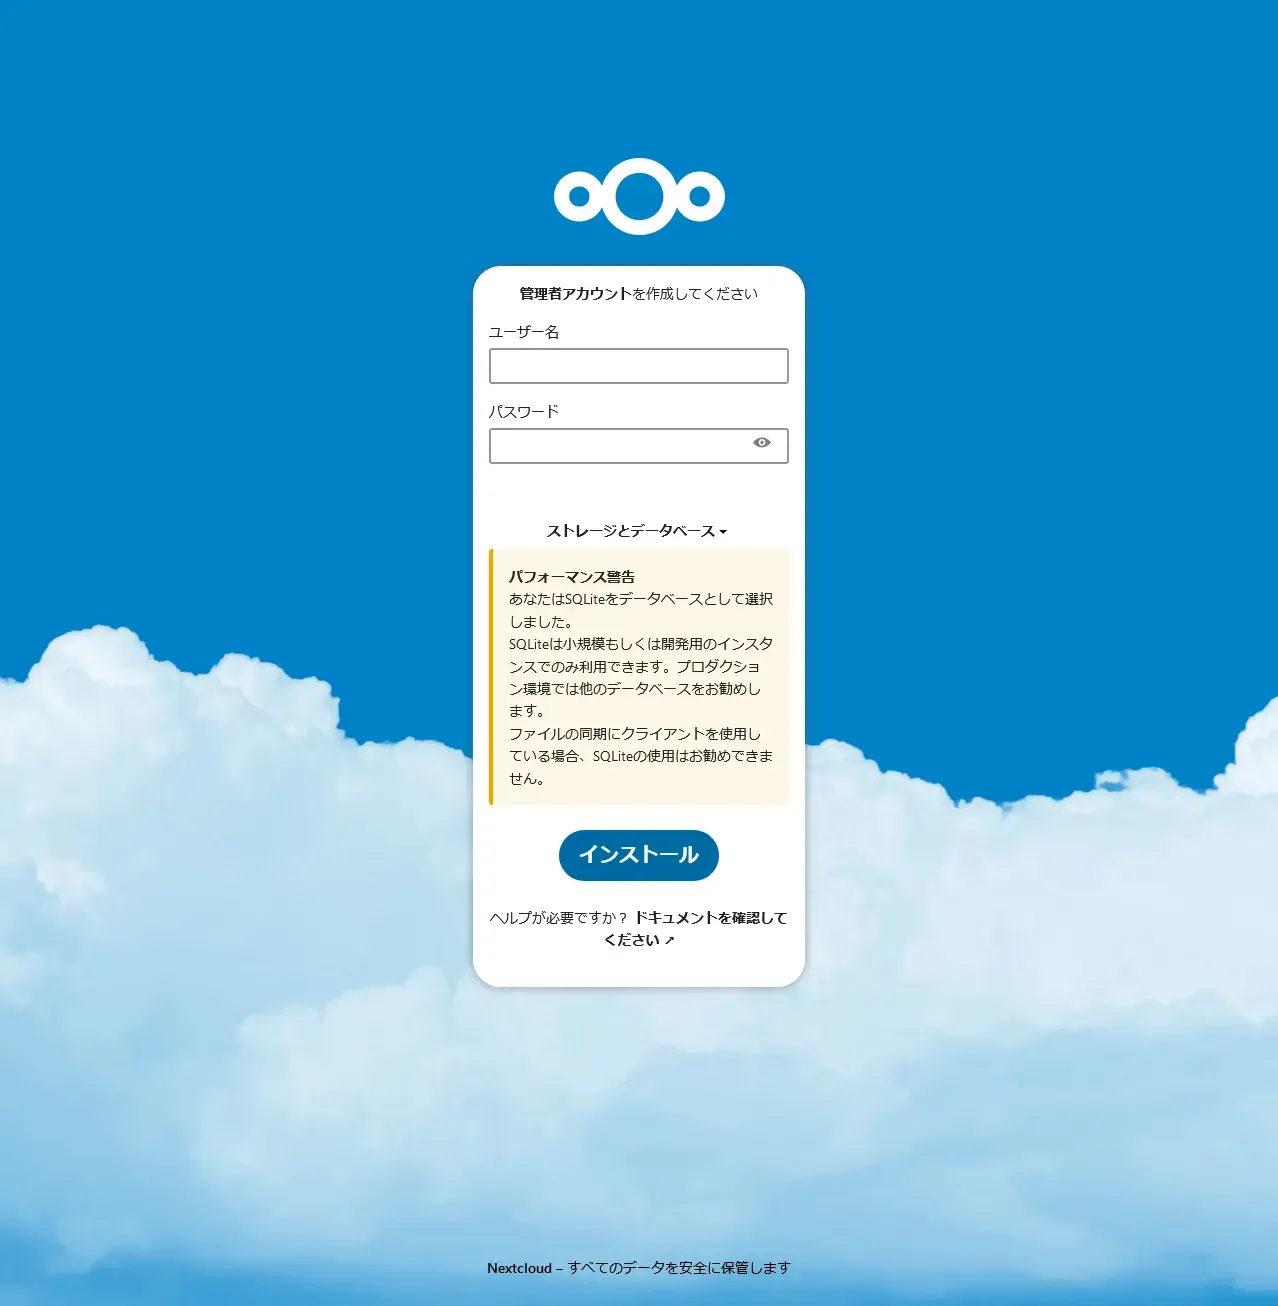
Nextcloud のセットアップ画面が表示されるので、DB に MySQL を使うように設定する。
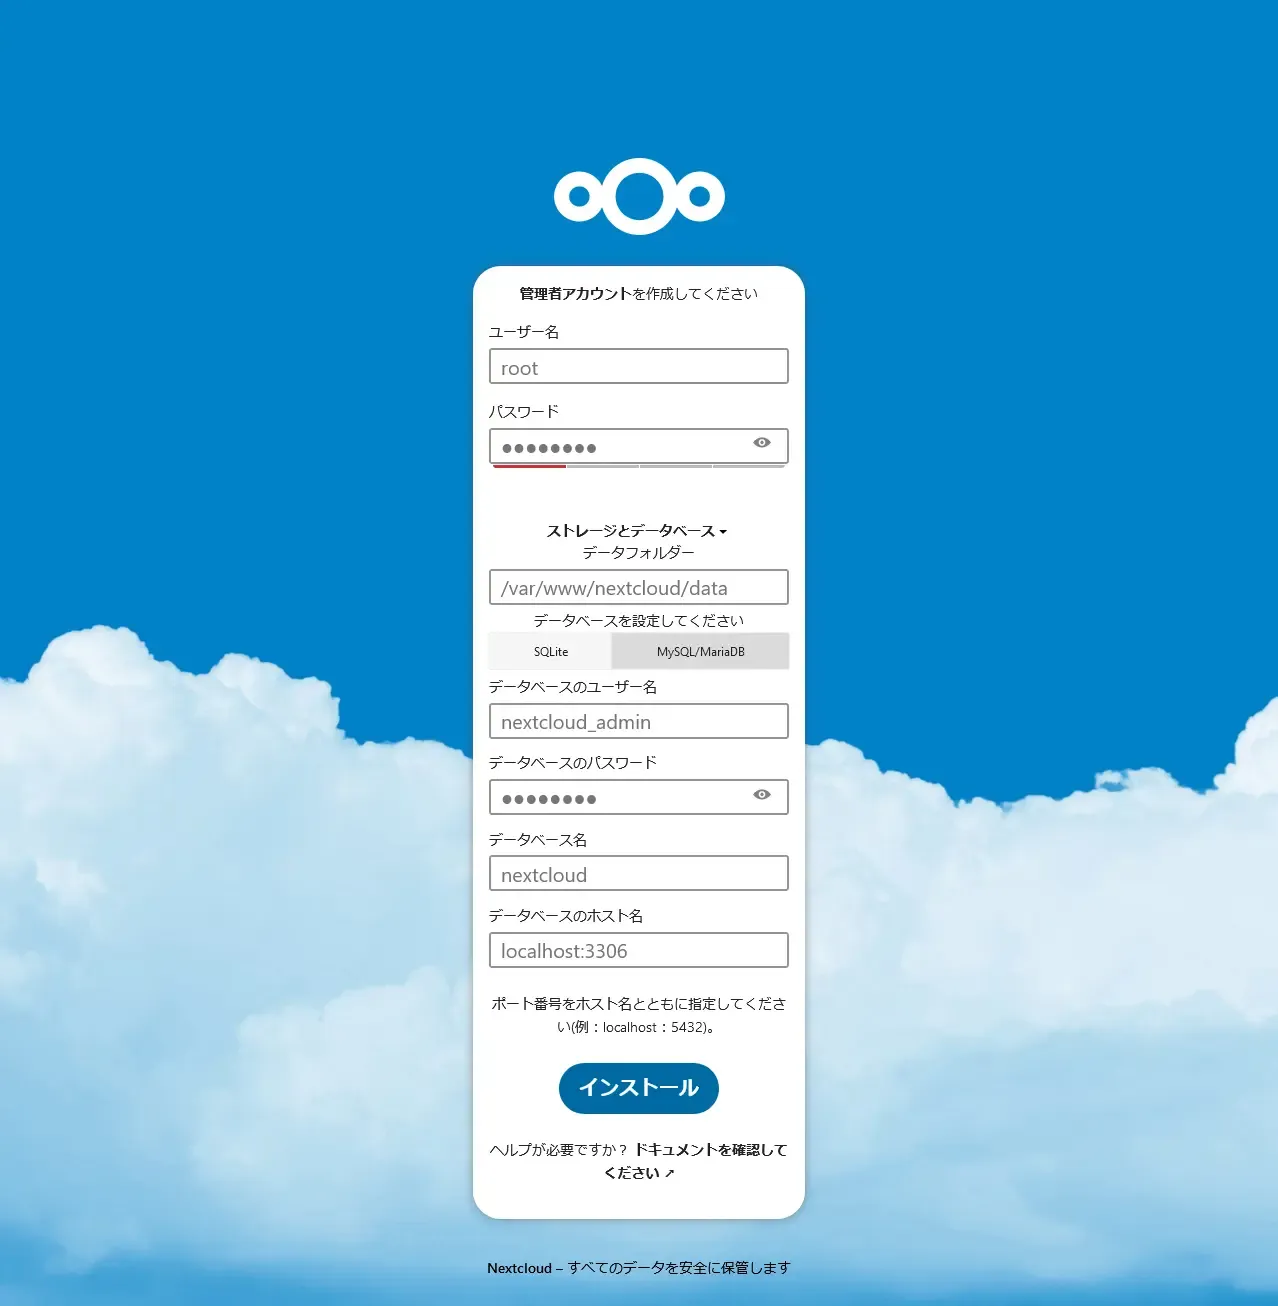
設定が一通り完了すると以下の画面に遷移する。
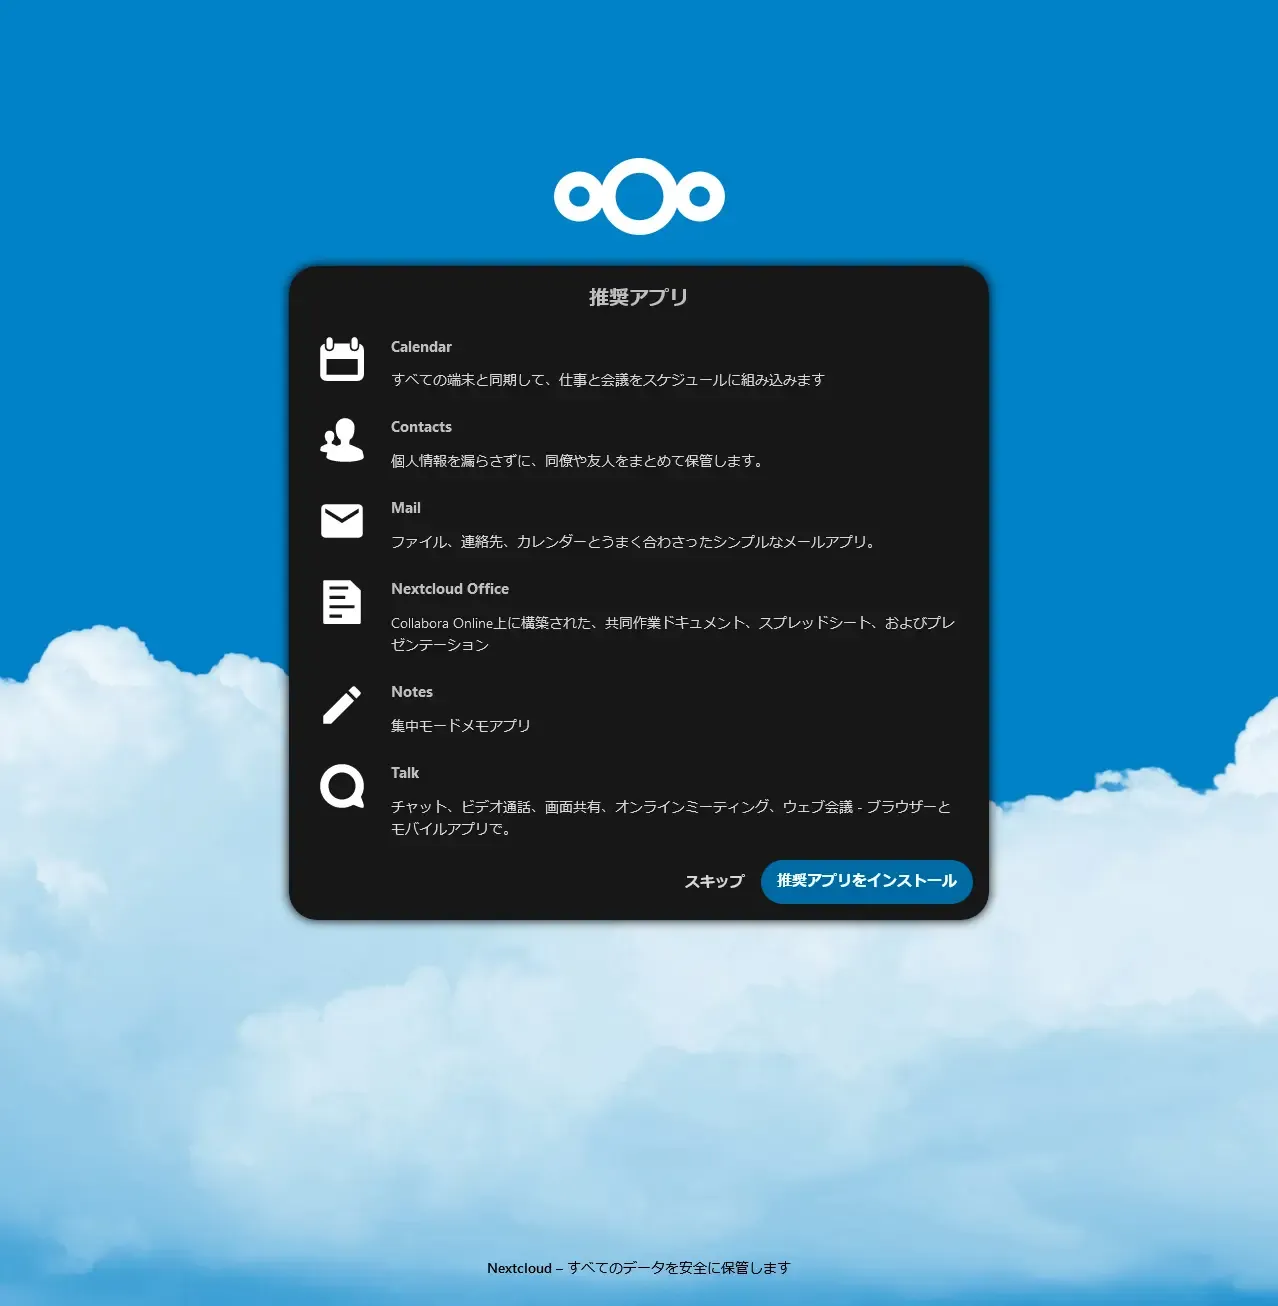
「推奨アプリをインストール」する。
完了すると以下の画面に遷移する。
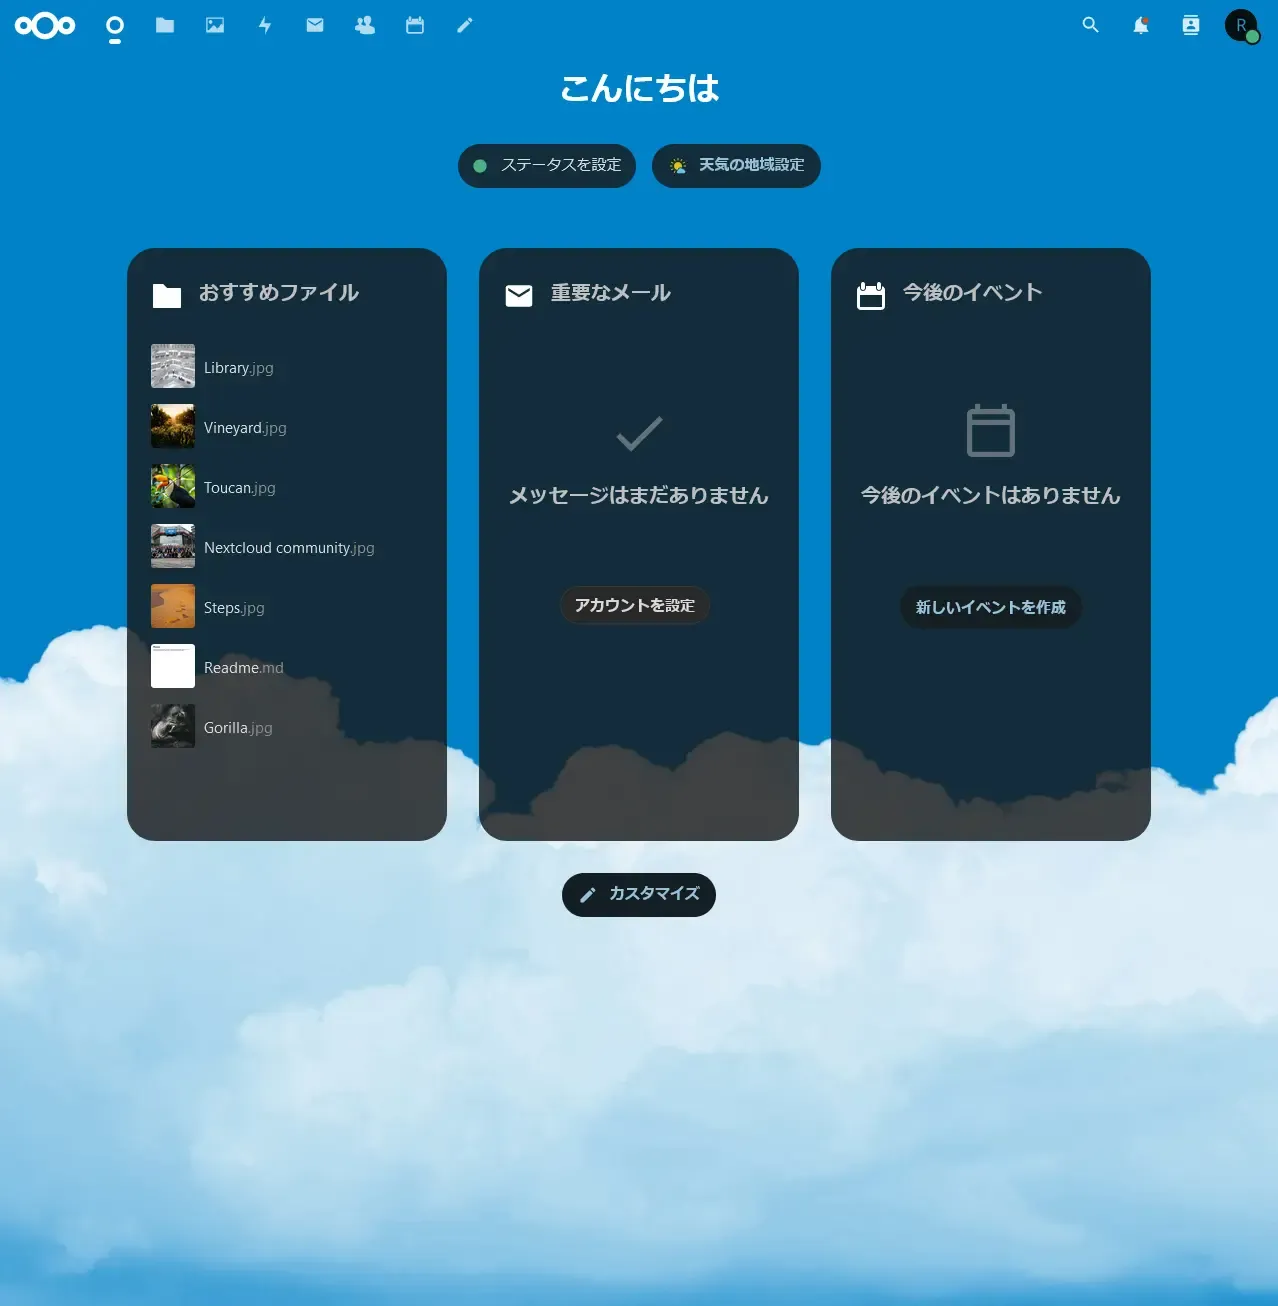
画像・動画ファイルが閲覧できることを確認する。
公式 Docを参考に、必要そうなものを設定していく。
semanage fcontext -a -t httpd_sys_rw_content_t '/var/www/nextcloud/data(/.*)?'semanage fcontext -a -t httpd_sys_rw_content_t '/var/www/nextcloud/config(/.*)?'semanage fcontext -a -t httpd_sys_rw_content_t '/var/www/nextcloud/apps(/.*)?'semanage fcontext -a -t httpd_sys_rw_content_t '/var/www/nextcloud/.htaccess'semanage fcontext -a -t httpd_sys_rw_content_t '/var/www/nextcloud/.user.ini'semanage fcontext -a -t httpd_sys_rw_content_t '/var/www/nextcloud/3rdparty/aws/aws-sdk-php/src/data/logs(/.*)?'
restorecon -Rv '/var/www/nextcloud/'
setsebool -P  httpd_unified  off
終わったら reboot。
Nextcloud を開き、手順実行前と同じように使えることを確認する。
前回、VM にパススルーした RAID ディスクを/var/www/nextcloud/dataにマウントする。
念のためにサービス停止。
systemctl stop nginx.servicesystemctl stop php-fpm.servicesystemctl stop mysqld.service/var/www/nextcloud/data下のデータを RAID ディスクに移す。
mount /dev/vdb /mntrsync -avh --progress /var/www/nextcloud/data/* /mnt/./var/www/nextcloud/data下のデータを削除して先程のディスクをマウント。
rm -rf /var/www/nextcloud/data/*mount /dev/vdb /var/www/nextcloud/data忘れずに/etx/fstabへ登録を行う。
...UUID=blkidコマンドで調べたUUID /var/www/nextcloud/data xfs defaults 1 2...終わったら reboot。
Nextcloud を開き、手順実行前と同じように使えることを確認する。
初期設定では root ユーザにパスワードが設定されていない状態になっているのでパスワードを設定して保護する。
ALTER USER 'root'@'localhost' identified BY 'hogehoge';とりあえずここまで作業を行った状態で Nextcloud に管理者でログインし、管理者設定を開く。
管理者設定では、「セキュリティ&セットアップ警告」を確認することができる。
現時点で表示されている警告は以下の通り。
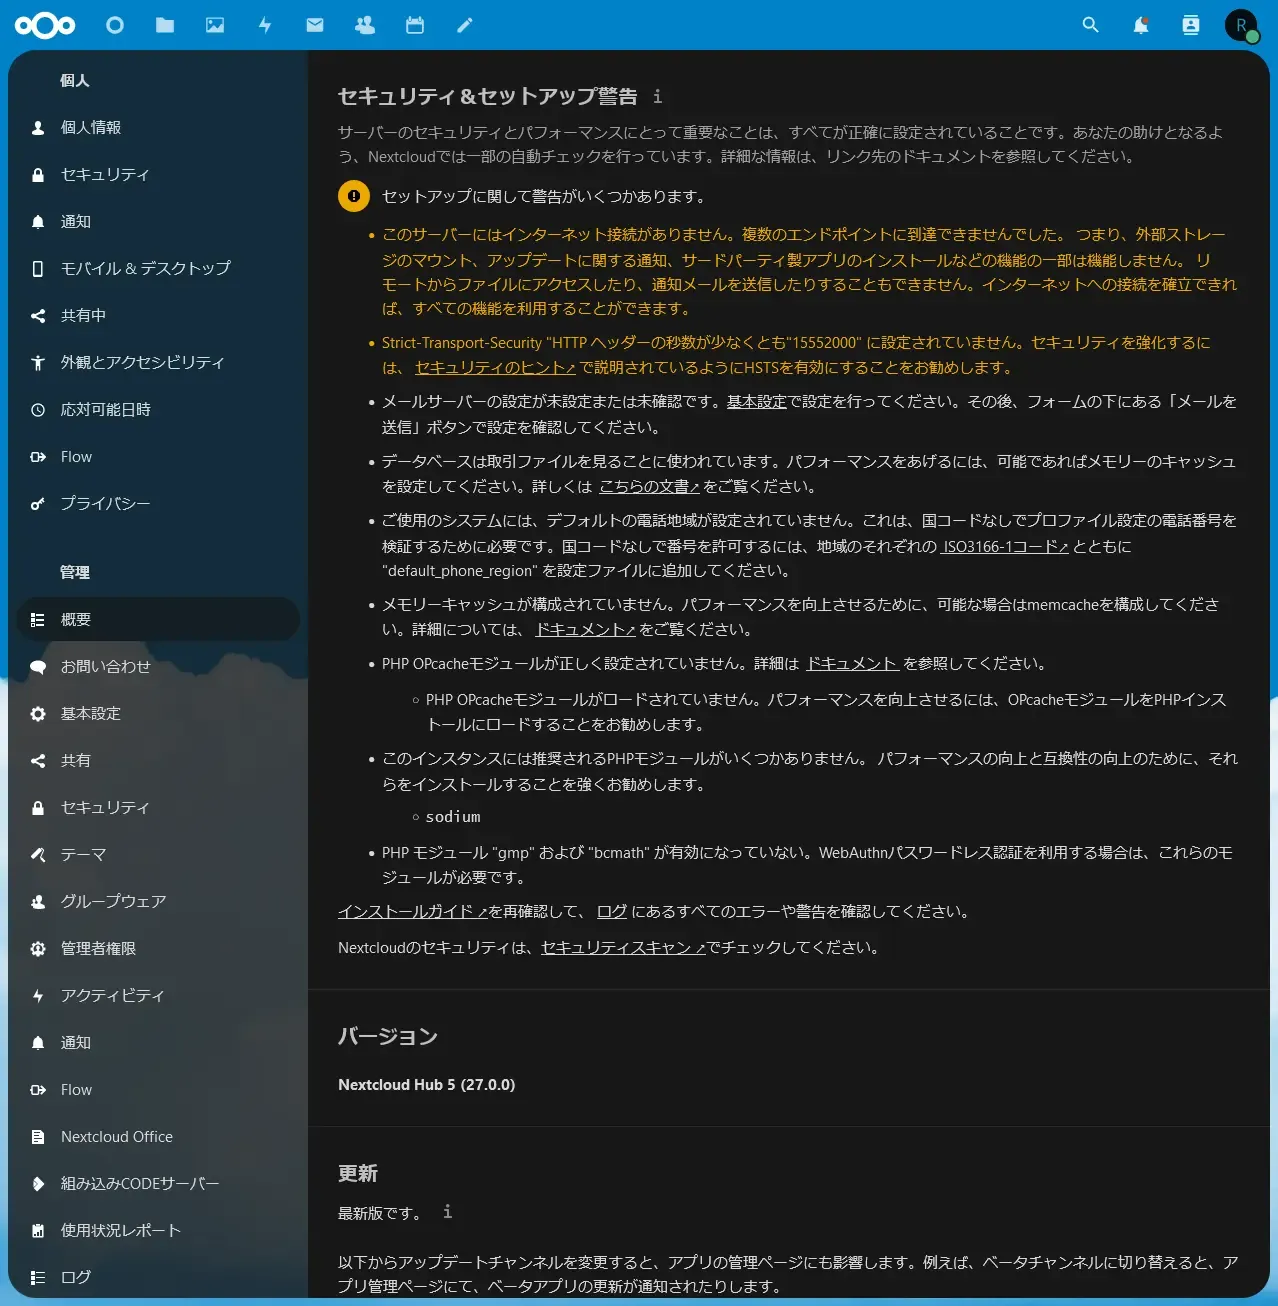
とりあえず黄色文字で書かれている部分をサクッと直す。
selinux で許可を与えるだけ。
参考。
setsebool -P httpd_can_network_connect 1設定しよう。
具体的には手順 6で設定した nginx の conf ファイルのコメントを外すだけ。
参考。
server { listen 443 ssl http2; ... add_header Strict-Transport-Security "max-age=15768000; includeSubDomains; preload" always; ...}完了したら、nginx を再起動。
※ Strict-Transport-security とは?
PHP のモジュール系は追加して php-fpm を再起動すれば OK。
dnf install php-sodiumdnf install php-bcmathdnf install php-gmpdnf install php-opcache
systemctl restart php-fpm.service長くなりそうなので他の警告で対応が必要なものはまた今度やる。(めんどくさい 😇)
手順 12で、当初はapache:apacheではなくnginx:nginxでセットアップを進めていたところ、下画像のようなエラーメッセージが表示された。
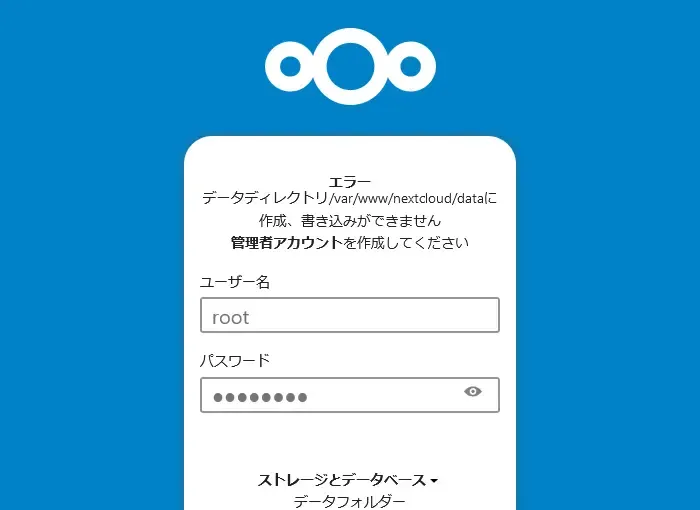
ディレクトリの所有者をnginx:nginxではなくapache:apacheに設定すると.ocdata ファイルを読むことができた。
apache:apacheは RedHat 系の OS で Web サーバがデフォルトで通常の操作に使用するユーザ?みたい。参考。
ただ、慣習的にはnginx:nginxで設定したいところ。より良い対処法を知っている人がいたら教えて 🙏
正しいユーザ ID とパスワードを入力しているのにログインできない。
特にエラーメッセージが表示されるわけでもなく、ログイン画面に戻されてしまう。
こちらの記事を参考に session ディレクトリ下の所有者をapache:apacheに変更するとログインできるようになった。
Almaliux9.1 での session ディレクトリのパスは/var/lib/php/sessionだった。
考察: 今回は個人用だから要らないかなと思って導入してないけど、 redis と連携するように設定すればセッションをそっちで管理してくれるはずなので自ずと解決する?
Office ファイルが Nextcloud(Web)上で閲覧できない。
Nextcloud Office の設定画面を見ると、「Collabora Online サーバーへの接続を確立できませんでした。Web サーバーの設定が不足していることが原因かもしれません。詳細については、以下をご覧ください。Nginx で Collabora Online へシングルクリック接続」と表示される。
個人的には写真・動画のバックアップに使えればそれで OK なので、 Office ファイルの閲覧が Web 上でできなくてもまあいいかということで放置。
解決したら書く。
考察: nginx で構築したとき固有の問題のようなので、素直に Apache HTTP Server を使えばこのような問題は発生しないと思われる。
Cloudflare Tunnel を使って外部公開する予定であれば HTTPS 化する必要はない。
80、443 ポートを避けて、 HTTP で通信できるように設定する。(例: 8080)
ポートを開放する必要なし。